skip to main |
skip to sidebar
Place mat Bags.
My friend, Sam, made this as a little scripture carrier for her daughter while I took pictures so I could try it myself. These can be used for a craft bag with projects that can be taken to the doctor's waiting room or a car trip, toy bag for kids, book bag, or gift bag. I made these two bags for my nieces that had Christmas presents inside.

Materials Needed
Cloth Place mats (you can get them at the dollar store)
Ribbon for straps-as long as you like (or you can cut a belt)
Directions
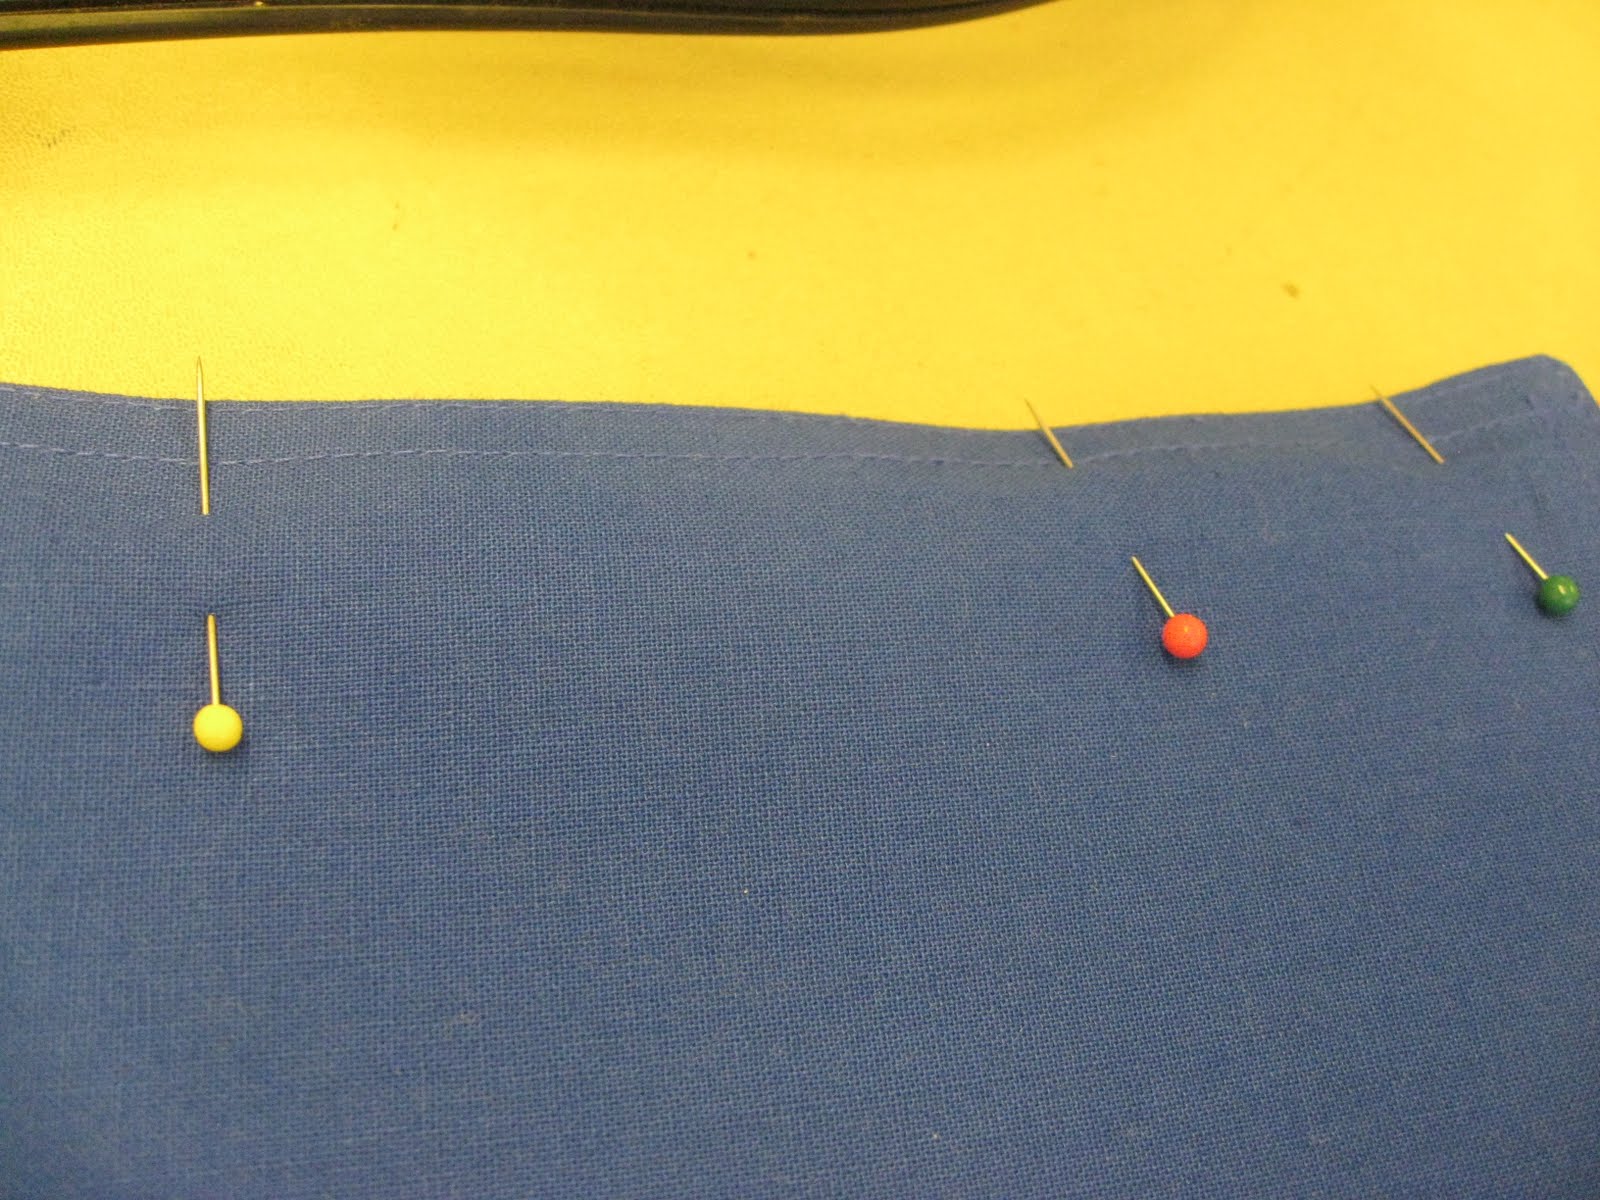
1. Fold the place mat in half, putting right sides together of the place mat (not the way where it looks long and skinny, the other way:))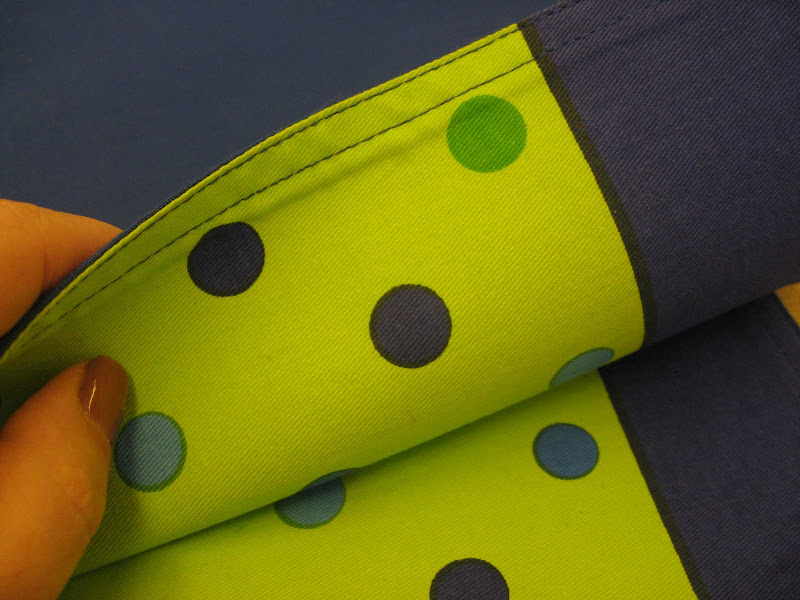

2. Sew the sides together -about an inch in from the side.

3. Open up the one inch flaps you just sewed and flatten them out. The right sides still facing.

4. To give support to the bag, sew a line about 1.5 inches from the corner of the bag. It doesn't have to be exact, just make sure it matches on the other bottom corner when you sew it too.


5. You can cut off the excess material. Sam cut it here, but I left it when I made my two bags (just see what looks best to you).

6. Turn the bag inside out (back to normal). You can add embellishments to the front like rickrack or a flower. Sam sewed her ribbon straps on and to cover where she sewed, she put a button. I just sewed back and forth over my ribbon to secure it (you can see it in the pink bag I made at the top of the post).


Simple, cute, and cheap. My kind of project. We did this in the nursery while the kids played with the toys and the moms chatted and crafted (the idea comes from my sister in law, Kimberly).

Just fyi, there are some cute little bags at Dollar Tree right now for...a dollar. I have a trendy friend Katie that I had made magnets for (I showed how to make the magnets in an earlier post), and I gave them to her in one of the bags for her birthday.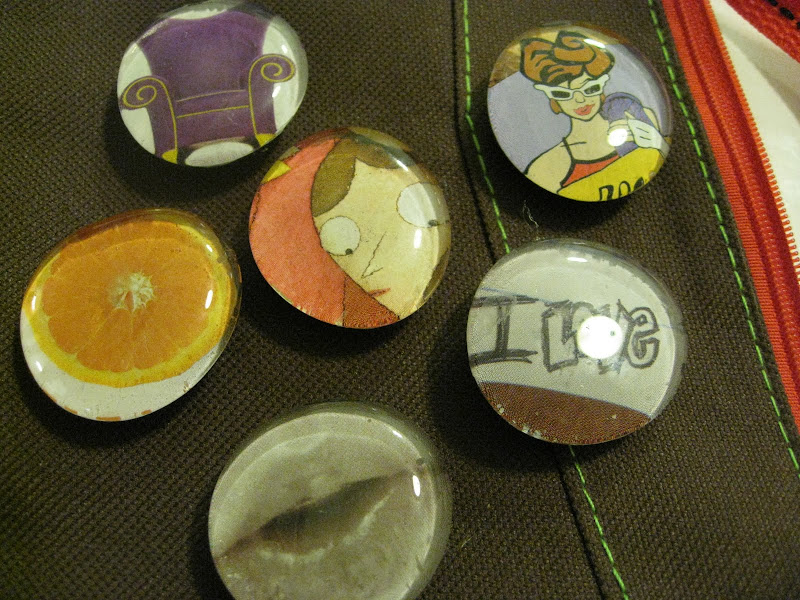

Challenge #5 Hair Accessories.
With Annie's birthday coming up, I've been working on some cute onesies and hair stuff for her. I wanted to give her a big package of everything I've been working on. I decided I always make things as gifts so I wanted to work on things for Annie. Here's all the stuff I've been working on this week:
1. Black and Gray Flower. I didn't take pictures as I went because I just goofed around with it until I liked it. I'll just try to explain what I did if you want to try it out. I cut out a bunch of felt black petals (flat on the bottom) and smaller gray ones. I folded the petals in half hot dog style (the grays were touching and were inside of the the black petals) and sewed them just above the bottom to give them a 3-dimensional look. I cut out two round black felt circles for the center. I stitched (by hand) all the petals to the first circle (on top of it). 
Then I stitched another circle on top to hide all the stitching. I stitched leaves on the back. I covered a clip with ribbon and hot glued it to the back.

Annie or I could wear this.

2. White Crocheted Flower. I made this for Annie awhile ago and just glued the clip on this week. I don't know a lot about crocheting but I just kept going in a circle. So they wouldn't get so bunched up, I added an extra loop on the chain. They're just three circles of different sizes. I stitched them together in the middle with normal thread.


I glued the clip to the back so I could clip it to Annie's headbands. White goes with most things.

3. Fabric Flowers. I made these earlier and just glued the clip on this week. I used the template from here to make the next three flowers. I followed the directions for the first and third flower, but for the second, I just put the flowers on top of each other. I did a little gathering stitch to make it not so flat looking.


I cut out an old bandanna to make this flower.

4. Easy Felt Flower. I hot glued a button on top of a tiny flower on top of a circle on top of a ribbon covered clip. No sewing.

5. Sweet Sweater Rosettes. Suzana bought these off Etsy. So cute. I made Lyla and Annie a headband out of gray tights (thanks Heidi Copa) by just sewing the ends together. It looked so cute with the white flower.


We followed this super simple tutorial here to make the same flowers. Instead of gluing the whole flower, like the tutorial said, I just hot glued every once in awhile and it stayed together nicely. Suzana just glued the bottom at the end and it worked well too.


It's so easy-perfect for the little crafter. After painting Lizzy's fingers (blue on one hand and foot and red on the other-I'm sure Kimberly was happy), she made a flower. Hard to mess up.


To make this black flower, I used the same tutorial for the center flower. The outside flower comes from a die cut flower. I just ran a a stitch through the flower and pulled/gathered it. I just glued the rose in the middle and glued the clip on the bottom.

6. Rose Barrettes. I went here for this rose barrette tutorial. I didn't feel like doing any sewing so instead, whenever the directions said to sew, I hot glued. It turned out cute. I did stitch around the leaf. I'm definitely going to make more in different sizes and colors.

It was so fun crafting with friends this week. The kids had just as much fun playing together.

Here are the pretty ones Heidi made this week. I'll have to get the low down on how she did them.
.JPG)


Bean Bags.


I made these for Marshal and Apollo for Christmas. They are so fun to play with and cute to look at. I stitched everything by hand except for sewing the actual bean bags together. My secret to getting anything done with 2 babies? I kept the felt in a big zip lock with all my thread, needles, patterns, and scissors. We travel a lot or go out. When I had a second in the car, I could work on a few stitches here or there. It was just as easy to take it in the house and work when I had a few minutes too. Here's how:
Materials Needed
* Felt
* Thread
* Silicon beads (at craft stores). Rice or beans would work.
* Pins (to hold pieces together)
Directions
1. Find some cute pictures you like off the internet, in kids' books, or draw them yourself.
Here's what I used:
For the fish and birds, I traced them out of one of Apollo's books, cut out the paper, and used it to cut out my felt.


For the tree, I saw an image I liked on google, and drew it myself.
For the elephant and owl, use these templates here and here (it's off Martha Stewart's website). She has a website here where she sells her collages for $140.00 each. I printed them off, cut out each piece, and used them to cut out the felt. You are welcome to use the same colors for each piece as I did if you like how they turned out.


2. I made my bean bags a little bigger than normal. I cut the felt in half (it will look like two rectangles) and cut off the longer parts of the rectangles to make them square.
3. Stitch the images onto one side of the bean bags using the felt and thread colors you like. 
4. Sew around the bean bag with a sewing machine. I didn't even turn them inside out. I thought the stitching looked cute (thanks for the idea, January).

Leave a little hole to fill the bag with stuffing.

Fill the bag with the stuffing you like and finish of the stitching. I used the silicon beads from Michaels.
5. I googled bean bag games and came up with a big list. I copied it off and put it in the boys' presents. I stacked the bean bags up and tied some yarn around them.

We played with them as a family the other night. We tried to get all our bean bags in a basket. Apollo had to stay behind the line and we made it fairly easy for him. Carleton and I were goofing off and would make it really hard for each other and put the basket in random places. We put the basket almost right under Annie and even she would throw the bean bags.


.JPG)