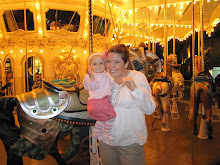
Sunday, June 28, 2009

Fun Party Decoration (or mobile).

I used these at a baby shower I threw. They looked beautiful over the food table. I saw a blog today where they used them at a wedding shower as a decoration.


Here is a picture I took of Annie just after I put the mobile up-she loved looking at the pretty paper.


Materials needed:*String or ribbon (I found some metallic thread I had)
*Paper
*Glue
*Mod podge (just if you want to put a glaze on the outside)
*Hole punch or scissors
*Foam brush (anything to use to wipe glue)


1. Hole punch the circles. I hole punched 72 for 6 (back to back) circles on 6 strings.


2. Put the string in the middle of the circles and brush the glue (I just used craft glue-anything would work) on the circle and string. I used a few magazines to glue and then would move onto the next page so I would have new surfaces that weren't sticky to work with.


3. Stick another circle on the back.


4. I put my circles in random places on each string-do it to your liking.


5. I bought some metal rings because I thought I would tie the strings to it to hang it above Annie's crib but I thought it looked more simple and pretty without the rings. I just found some flat thumb tacks I had that I used to hang them above her crib. At the shower, I just hung them with tape-they looked great.


Wednesday, June 24, 2009

Flower Cards.

I've been making hair clips with flowers on them and I thought the flowers would look cute on cards as well (the cards flatten down so they can be put into envelopes). I did these in one evening.

Materials needed:
-Cards or paper folded to look like a card (I bought my super cheap at Target)
-Fake flowers
-Brads (you can put buttons or anything else as a flower center-I bought some glittered brads again for cheap at Target)
-hot glue gun


1. Cut the stem part of the flower.


2. Take the petals completely off the plastic part.


3. Stick the brad through the holes (where the stem was). Then stick the brad through a ribbon.


4. Glue the ribbon onto the card. The edges of the ribbon will be a little frayed on the ends. Run a little hot glue on the ends to seal them (this way you don't have to waste ribbon by folding it under).

Here are some other flowers, ribbons, and brad colors I tried:


Friday, June 12, 2009

Beach Towel Bag.

I loved this idea from my friend, Michelle:

BEACH TOWEL BAG DIRECTIONS

About 3 years ago I bought one of these bags from the store and have just LOOOVED it! I use it to transport all my towels (both wet and dry) to and from the pool/beach ect. It's roomy and easy to wash with all the wet towels (but it could obviously be used for other things as well). Anyways, my mom has hinted to me numerous times that she wanted one, so after a number of years I decided to make one for her b-day this year. And since it was sooo simple, and super inexpensive (I paid $3.87/towel at Wally-World---sorry if you're a recipient of my new summer b-day gift--it really was that cheap) I figured I'd share the directions with my blogging friends. You buy 2 towels, but really you only need 1 towel plus 4 inches of another. So I bought one towel that had large stripes (just your basic beach towel) and used that as my "strap" towel ( I was able to get enough "straps" out of that one towel to make 6 towels). And another towel for the main bag part.
Here's the 2nd towel I used for my straps. It worked perfectly because the stripes were already the exact width I needed (just be sure to measure it only 41" long though--you don't need the full 58")


Sew the strip closed. I liked the feel and look of sewing four lines down the strap, it made it feel more--"strappish" but you could do 3 if you prefer --just make sure it's securely sewn.

Attatch the straps to the wrong side of the short end of the towel (make sure your strap isn't twisted when you attatch it).


Fold right sides together of the main towel (your straps should already be sewn--I forgot to take the pic at that stage--just invision) 18" up and sew the seams along both edges.


Turn the bag right side together, and WAHLAH.
Finished beach bag.
English Teacher Gone Mom.

My friend, Bonnie, and I were first year high school teachers together. She taught English and I taught Chemistry. She saved me that year. She's since had two cute little kids. I follow her blog and have fun seeing the creative and cool mother that she is. I asked if I could post her ideas on my blog and copied these pics and her words. Such good ideas. I love the little necklace she made for Audrey.

This is from her blog:
We have had a fun week learning the letter P. This has been by far my favorite! We started out with our typical activity, of cutting out the capital and lowercase letters, talking about and drawing what starts with P, etc. I had made a little paper book and had written a P word on each page, and printed clip art for each word. I put five or six pictures out at a time, and read the book with Audrey, asking her to find the picture that matched the word I read, then tape it to the page. There were about 30 pages. She was really into that. Once we were done she was supposed to color the pictures, but she decided to play with her toys instead. The above picture is the best I got while asking her to hold her book up so it could be in the picture too.
Another day we made pancakes in our pajamas and read about the prophet of our church in the Friend.


One night we made pizza for dinner. Audrey had her own dough and pan, and copied me while I pushed out the dough. Then she put on her own toppings (I did the cheese).


Another day we played pirates. Under all that pirate gear, she's wearing princess shoes. It works.

We also had a picnic in the park one day, and it was actually quite peaceful for me. I relaxed on the picnic blanket with Ian while Audrey ran around.
We made popcorn and glued some to a picture of a tree, singing Popcorn Popping. Audrey was fascinated by the air popper. We did puzzles. I was going to make a puppet show about the three little pigs but never got around to it. Maybe this week I will. There are so many words that start with P and I kept pointing them out when we'd read stories or talk at the dinner table. I think Audrey started to get irritated with me saying, "P-p-peas starts with...?" or "What does p-p-purple start with?" Don't worry Audrey, I'm sure I'll tone down the enthusiasm with letter Q.

Sunday, June 7, 2009

Muffins. Healthy and Yummy.

1. Bran muffins on the Bran Flakes box (the Ralphs brand) -it's kind of fun because they don't have any sugar
Ingredients
1 cup Bran Flakes Cereal
1/4 cup Skim Milk
1 cup all purpose flour
1/2 cup honey
1/4 cup melted margarine
2/3 cup mashed ripe banana
1 1/2 tsp. baking powder
1/2 tsp. salt
1/4 tsp. baking soda
1/2 tsp. cinnamon
1/4 tsp. ground ginger
1/4 tsp. ground nutmeg

Directions
Heat oven to 375 degrees. In a small bowl, soak cereal in milk for 5 min. In a large bowl, combine remaining ingredients, then add cereal mixture. Beat at medium speed, scraping bowl often, until well mixed (1 to 2 minutes). Spoon into greased or paper-lined 12-cup muffin pan, filling cups 2/3 full. Bake for 20 to 25 minutes, or until tops spring back when touched lightly. Cool 5 minutes; remove from pan. Yield: 12 muffins.


2. Peach-blueberry Oatmeal Muffinmania from Hungry GirlIngredients
1 1/2 cups regular oats (not instant)
1/2 cup flour (not packed)
2 Jell-O Sugar Free Vanilla Pudding Snacks
1 cup canned peaches in juice, drained and chopped
1/2 cup blueberries
1/2 cup fat-free liquid egg substitute (I used real eggs)
3 Tbs. light vanilla soy milk (I used nonfat milk)
2 Tbs light whipped butter or light buttery spread (I used regular butter)
1/4 cup plus 2 Tbs dark brown sugar (not packed)
2 tsp baking powder
1/2 tsp cinnamon
1/4 tsp salt
Directions
Preheat oven to 375 degrees.

Combine oats, flour, sugar, baking powder, cinnamon, and salt in a large bowl and stir well.

In a separate bowl, combine pudding, butter, soy milk, and egg substitute. Blend well with a whisk.

Add pudding mixture to dry mixture, stirring until just blended. Slowly fold in peaches and blueberries.

Divide mixture evenly into a 12-cup muffin pan sprayed with nonstick spray or lined with baking cups. Bake for 18 minutes or until a toothpick inserted in the center comes out clean.

Makes 12 servings

PER SERVING (1 muffin):110 calories, 1.5g fat, 124mg sodium, 22g carbs, 1.5g fiber, 8g sugars, 3g protein


3. Caramel Pumpkin Pudding Cupcakes from Hungry GirlIngredients
For Cupcakes
2 cups moist-style yellow cake mix (1/2 of an 18.25-ounce box)
1 cup canned pure pumpkin
1/2 cup fat-free liquid egg substitute
(I used real eggs)
2 tbsp sugar-free maple syrup
(I used 100 % real maple)
2 tsp cinnamon
2 tsp Splenda No Calorie Sweetener (granulated )
(I used real sugar)

For Topping
3 cubes (about 1 ounce) chewy caramel
2 teaspoons light vanilla soy milk
(I used nonfat milk)
Directions
Preheat oven to 350 degrees.

Combine all cupcake ingredients in a mixing bowl with 1/3 cup of water. Whip with a whisk or fork for 2 minutes until well blended.

Spray a 12-cup muffin pan with nonstick spray or line with baking cups. Evenly spoon batter into muffin cups. Place part in the oven and cook for about 12 min. (until cupcakes have puffed up but still appear a little gooey on top).

Once cupcakes are cool enough to handle, arrange them closely on a plate so that the edges are touching.

Place caramel and soy milk in a tall microwave-safe glass or dish (mixture will bubble and rise when heated). Microwave for 1 1/2 min. Stir mixture vigorously until smooth and thoroughly blended. (Return to microwave for 30 sec. at medium heat if caramel has not fully melted.) Immediately drizzle caramel sauce over cupcakes.

Makes 12 servings

PER SERVING (1 cupcake): 108 calories, 2g fat, 188mg sodium, 21g carbs, 0.5g fiber, 12g sugars, 2g protein


another 4. Bran Muffin recipe-Apollo's had some pretty crazy diapers after eating these!
Ingredients
2 C boiling water
6 C bran cereal
1 C butter, softened (I've replaced half the butter with baby food or apple sauce and they taste moist and good)
3 C sugar
4 eggs
1 quart buttermilk
5 C flour (I use whole wheat flour)
5 tsp baking soda
1 tsp salt

Directions
Mix water, 2 C bran, butter, and sugar. Then mix in the rest of the ingredients. Add four more cups of bran. Let set 1 hour and bake at 400 degrees for 15 min. Can keep mixture in fridge up to 2 weeks.

Wednesday, June 3, 2009

Pan"cakes"

We've been busy moving this week and have been packing up the house for awhile. We left the grill out and a bowl. For three nights we had pancakes. The first night we died them pink and set out a variety of sprinkles, syrup, and peanut butter for everyone to use on top (we babysat a couple kids and they ate a lot too). The next night we mixed the sprinkles into the batter and cut a candy bar (that Apollo had grabbed from the shopping cart and started nibbling on so we had to buy it) into pieces. The third night we poured some frozen berries into the mix. It was funny because it was a very plain wheat batter with extra fiber but because they looked fun, they were a hit. They are easy to store in zip locks then put in the toaster when you want to use them. Apollo called them "cake" instead of pancakes.