We draw names of a family member, and for Christmas Eve we give a handmade gift to that person. I drew my sister, Heidi, and made these headbands for her out of things I already had in the house (but I do have a lot of crafting stuff here).
I went to a party for a couple of Apollo's friends and they handed out lady bug headbands (headbands covered with red ribbon and little antennae sticking out). I wear them all the time (minus the antennae) because they are so comfortable and don't hurt my head. I went back to the Dollar Tree (I found out from my friends' where they got them) and bought all the fabric covered kids' headbands they had ( they come in a package like 6 for a buck). I used these headbands for all six of these.
Headband #1.

Quite awhile ago, I made a couple of hair clips at my friend, Lindsay's house. She had one that looked like this.

To make it, cut three squiggly and imperfect circles out of felt. Put them on top of one another and fold them all toward the center like a flower. Hand stitch the felt enough so it stays in place.

Here's what it looked like when it was done. You can leave it like this to put on a headband, purse, shirt, etc.


To make my headband, I turned it inside out (pushed what looked like the bottom of the flower up through the petals) to look like this.

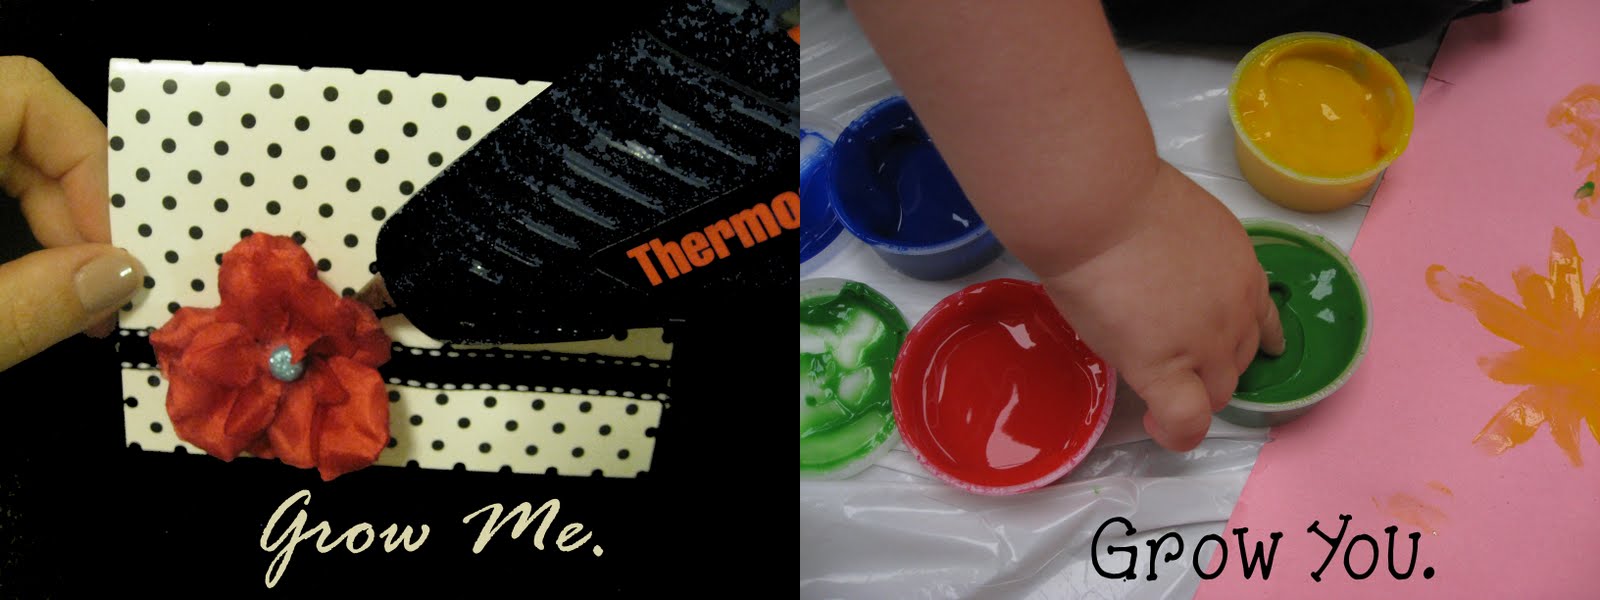
You can put a button for the center of the flower or a brad (a brad was used here). To use a brad, cut a little hole through the center of all three flowers and push the brad through.

Hot glue the flower to the headband. If you want it to be more secure, you can stitch it to the band.
Headband #2.

The gray material from this headband comes from the cover of an old stroller my mother-in-law uses when kiddos need it.

I used the finished edges to make the center three flowers. I just wrapped it around tightly and sewed it together-enough to make it stay.

Here is the backside of one. Not pretty, but it does the job.

I cut out three circles and put them together-smallest to largest, running a stitch through the middle to hold them together. I hot glued my three flowers in the middle. My sister showed me how you can take a strip of material and twist it around to get the same effect (so you don't need a finished edge). I have a cute outfit of Annie's that is stained beyond repair with lots of finished ruffles that I might use to make another headband.


Headband #3.

This felt ribbon came off an earlier gift I had received. There were metal things on it (like garbage twist ties). I used them to wrap around the headband and hot glued it as well.
Headband #4.
I found the tutorial here from the Wise Craft blog to make these flowers made out of material. I have made a lot of these and used them on the outside of gifts, headbands, and with a pin on the back so you can put them on purses or clothing. I have used a lot of different buttons and materials (including part of a brides made dress top). This flower cam from an old bandanna I had and the button came from my mother-in-law's collection. I just glued it to the band once I was finished.

Headband #5.
I also used an old headband to make this flower and the same blog to make the flower. I had made headbands for my whole family to wear on our annual Moab trip (lots of rock climbing and hiking).

Headband #6.
Look familiar? This time I covered the band with some ribbon. I gave it kind of a textured look (really, I couldn't get it flat because the ribbon was too big but I think it turned out better that way) by hot gluing the ribbon to the band. I had some material from year's ago that I had planned on making a skirt. You'll be surprised at the materials you can find in your house from old clothing to old accessories that can be used to make these flowers.

love them! You need to come teach me. I learn better by doing it with the person that already knows how.
ReplyDeleteYAY! thanks for posting these! Loves!
ReplyDelete